We use cookies to help give you the best possible experience on our site. Strictly necessary and functional cookies support login and shopping cart features, they cannot be disabled. Performance cookies support site performance analysis. These are optional and will be disabled if you click on Reject.
By clicking Accept you agree to our use of Performance cookies as detailed in our Privacy Policy.
We’re thrilled to announce that the last macrotopic Medieval Misconceptions of A Lens On - Snapshot has been completely released.
Head over to the playlist:
now to catch all the pills about Medieval Misconceptions.
This is the final chapter of our journey, but before we wrap it up, our friend DasTactic will present his final episode:
Medieval Life and the Woes of Wessex
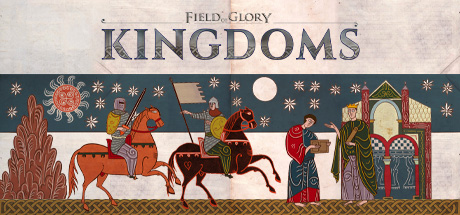
Field of Glory: Kingdoms is a deep strategy sandbox that models myriad layers of medieval society and kingdoms. Our current playthrough of Wales draws inspiration from the YouTube series A Lens On, presented by Dr. Claire Kennan. This series offers short yet insightful videos covering various aspects of medieval life, with recent episodes focusing on maritime advancements.
The War is Over
In the previous episode, we had just concluded our war with England and its earldoms: Northumbria, East Anglia, and Mercia. The war’s outcome heavily favoured Wales, particularly at the expense of Mercia.
Mercia ceded three provinces to Wales, significantly expanding our domain.
Northumbria also lost a province, bringing it under Welsh control.
With these new territories under our banner, we appointed a governor to help stabilize and manage the holdings. This expansion not only broadened our influence but also provided access to new military resources.
The Mercian Ostmen
One of the more strategic benefits of the Mercian territories is access to new recruitment options:
English Bowmen, acting as long-range skirmishers, though not yet the formidable Longbowmen of later centuries.
Levied Ostmen, a significant addition to our military strength.
Previously, Ostmen were available only as expensive mercenaries. These heavy infantry units, while not as powerful as Viking Huskarls, offer a reliable front-line presence. Now, as levies, they can be recruited using manpower, equipment, and iron—saving vital gold reserves.
We opted to levy two Ostmen units, doubling our available heavy infantry and preparing for future conflicts.
Wessex on the March – And the Fall of Harold
Meanwhile, Wessex—having thrown off its vassalage to England—goes on the offensive. England, weakened by its war with Wales, becomes the target. Harold Godwinson of Wessex marches on London in an ambitious bid for dominance.
However, the campaign ends in disaster. Harold is slain in battle, plunging Wessex into turmoil. A rapid succession of rulers culminates in the rise of Earl John, a mere one-year-old child. A council of advisors governs in his place—and their decisions leave much to be desired. Amid English devastation of Wessex, the council inexplicably declares war on Anjou, opening another front.
Northumbrian Raids and Rising Tensions
Despite a formal peace treaty, Northumbrian forces launch raids across the new Welsh border. These incursions are largely ineffective, but retaliatory strikes by Welsh forces fail to capture or neutralize the rogue elements.
Though a full-scale conflict is avoided initially, the provocations cannot go unanswered.
A Return to War
Once the peace treaty expires, Wales wastes no time. Outraged by Northumbria’s betrayal, we march to war once again. This time, we forego a formal delay: the declaration of war is issued as our army crosses the border into Northumbria.
A small Northumbrian force is swiftly routed.
A siege begins, though early signs suggest it will be drawn out.
To avoid a prolonged stalemate, we decide to pursue the main Northumbrian army, believed to be stationed further south. As we march through the English forests, Northumbria launches its own offensive, pushing westward into our lands.
But fate favours us—our army intercepts the main English force on the eastern coast, setting the stage for a decisive encounter.
A Clash of Armies – East Coast Showdown
The two armies are now arranged for battle in a hilly and forested terrain, conditions that will influence tactics heavily.
Northumbrian Forces: Offensive Spearmen with a formidable contingent of Huskarls.
The terrain limits flanking opportunities, favouring the solid shield walls and staying power of heavy infantry. However, our cavalry’s mobility could turn the tide if leveraged effectively.
The outcome of this clash will shape the next chapter of our alternate medieval history. Will Wales cement its dominance, or will Northumbria’s Huskarls hold the line?
Looking Ahead: The Final Reckoning
As we end this session, the battle looms. Months of maneuvering and diplomacy have led to this moment, the ultimate clash that will decide the fate of the Northumbrian war and shape the future of the British Isles.
Will our cavalry punch through the English line?
Can the Ostmen stand up to the Huskarls?
What impact will the chaos in Wessex have on the balance of power?
Thank you for marching with us through every twist and turn of this epic campaign. If you want to see how it all ends, be sure to catch the final showdown on DasTactic’s channel.